
In part 1 of this training, I explained why it’s a good idea to build your own (EMAIL) traffic source and why now is more important than ever to do it right.
Let’s get to it…
We are going to build a SMTP email server that gets authenticated with all ESPs and gets you 10/10 sending inbox score (will use mail tester for this).
Note: I want this guide to be as detailed as possible so it can serve everyone regardless of their tech experience with VPS setup and running Linux commands.
And of-course I will include screenshots whenever possible.
However, feel free to scroll to the parts that interest you if you’re more technical.
Alright…
Here we go…
You are going to need a Domain name and a VPS server.
And we are going to use Cloudflare (CF) to connect the domain to the VPS and setup the required DNS settings.
Tip: You can do it without using CF, directly at the domain name provider but it’s easier (and DNS propagates quicker) via CF.
Get a Domain
I like NameCheap for getting my domains.
For the domain name use something that will make sense for what you’re planning to use the mail server.
So head over to namecheap and get one (if you don’t have a handy one already)
So if am sending emails for weightloss offers then I’d try to find a name related.
And ensure it ends in .com what ever the name as other extensions are not (that) trusted.
Hint: You can use a domain name generator to get ideas.
Pro Tip: You cannot get a 10/10 score when the domain name is less than 30 days old. So if you need a 10/10 sending score from day 1 then you’ll need to use an existing domain name.
Once you have the domain, next you’ll need to get a VPS server.
Get A VPS
You’ll need a VPS with just 1 IP address
Regardless of what you may have read, it’s OK to use the same VPS for the mail sender, sending domain and sending IP address.
Pro Tip: A single IP address can send millions of emails. Spammers use multiple IPs in rotation to avoid blocking of their emails. But that’s an immediate giveaway red flag with the Google’s and Yahoo’s of this world.
The way I recommend to use this SMTP is to build a list from scratch with an “organic” progress. So the required warming up of the new IP Address will happen gradually.
Having said that I will also include a simple warming up plan to use if you already have
a big list and want to send to them…
Alright so head over to your favorite VPS host
In terms of VPS specs, any VPS with 2 vCPUs, at least 4GB Ram, and at least 50 GB NVMe Hard disc will more than suffice for now. Later on you can scale if needed.
Pro Tip: NVMe discs are faster than simple SSDs. So if you can get that as there will be a lot of processing between vCPUs, RAM and Hard Drives.
You can get a very decent one here, for less than 10 USD here

But what ever you like to use as your host, it’s OK
Pro Tip: I recommend avoiding Vultr and Digital Ocean if you are new customer with them, as these hosts have port 25 (and other ports for bulk mailing) closed to new clients. So you can’t use these for bulk mailing.
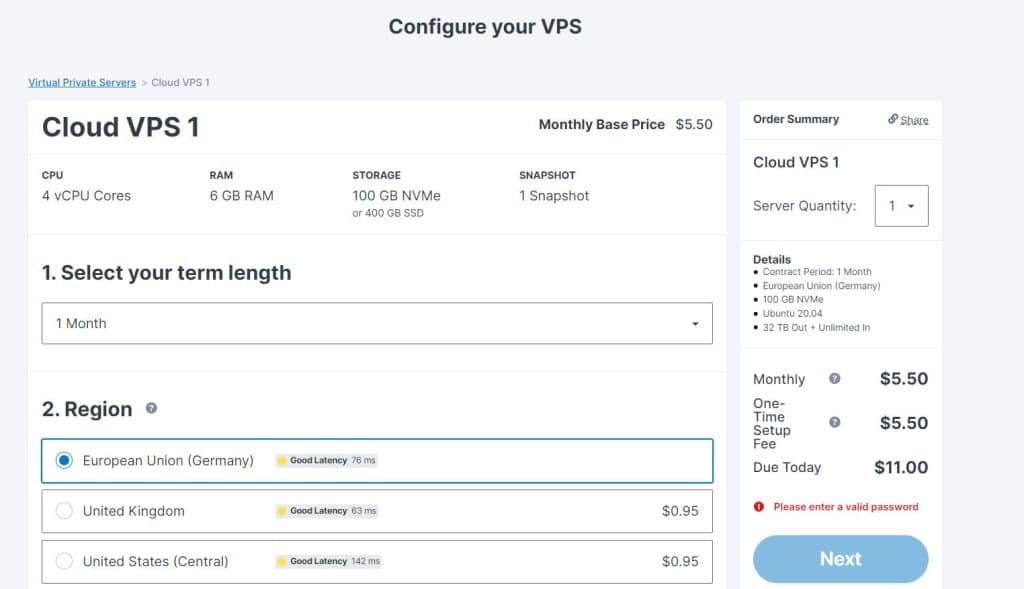
If you’re using the host I recommend, you want the Cloud VPS S plan.
Select that and on the next screen and make your selections
A few things to keep note here…
When it comes to region, if you are going to be mailing for different GEOs then select one region in the middle. e.g. EU
Storage, select the Included in the price 50 GB NVMe option
Image, select Ubuntu (either 20.04 or 22.04)
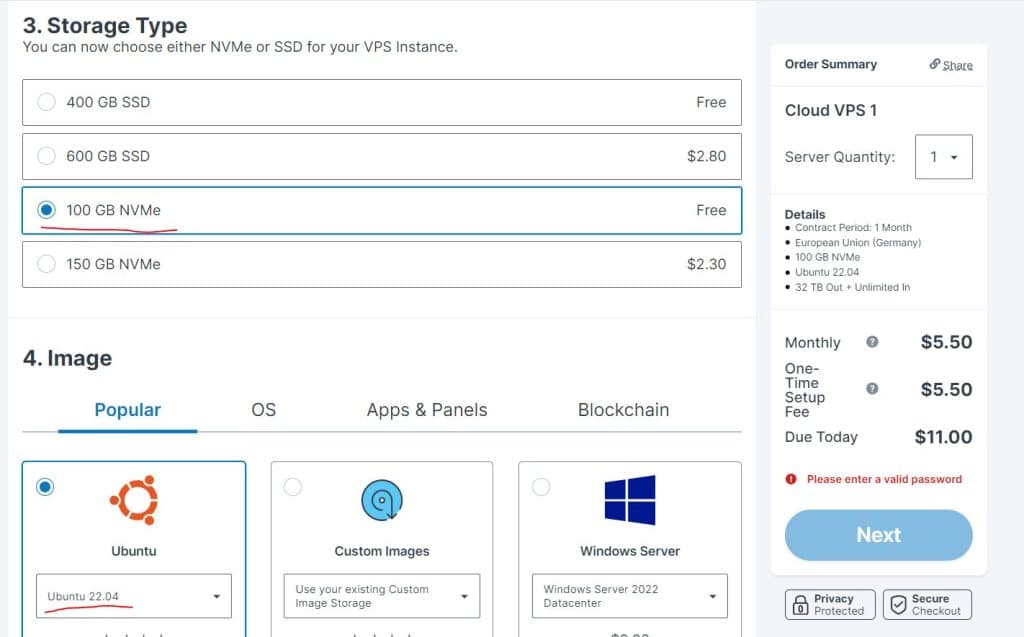
Tip: No need to select a panel.
At login and password, please type a root password for the VPS that does NOT contain any special characters.
This is the password that you’ll use to login into your server. So make sure to write it somewhere.
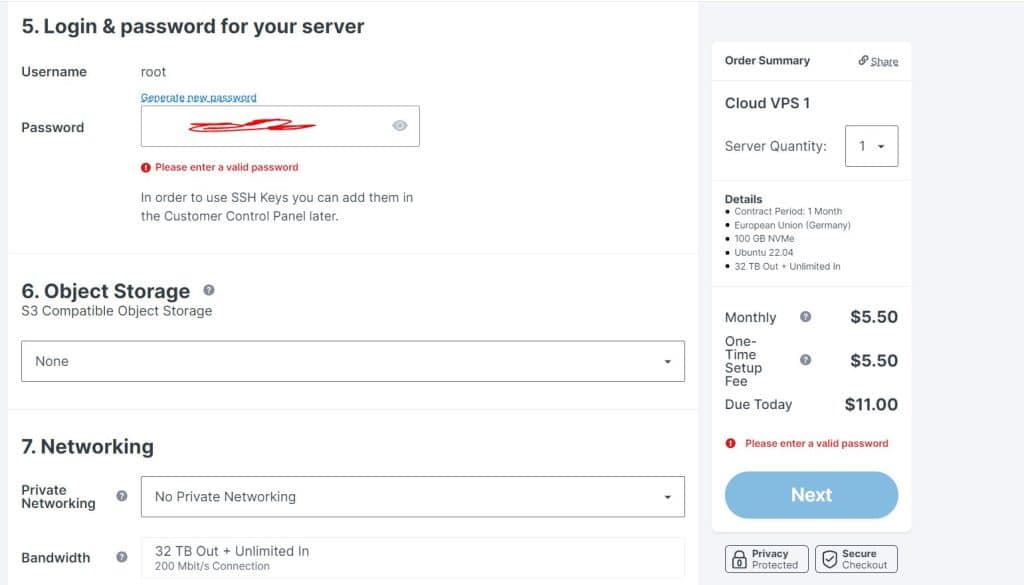
Tip: You can change this on first login to the VPS
You don’t need to change or select any other options.
Just scroll down and select NEXT.
On the next screen fill in your personal details and proceed to make payment
After you’re done you ll get to a thank you page and within 1-3 hours you’ll get an email notifying you of the VPS login details for the VPS host dashboard.
After you login to the dashboard, you will see your VPS credentials and IP Address.
Pro Tip: When you get the email with the VPS IP Address, I recommend copying teh IP address and run it against blacklist check services, like this one.
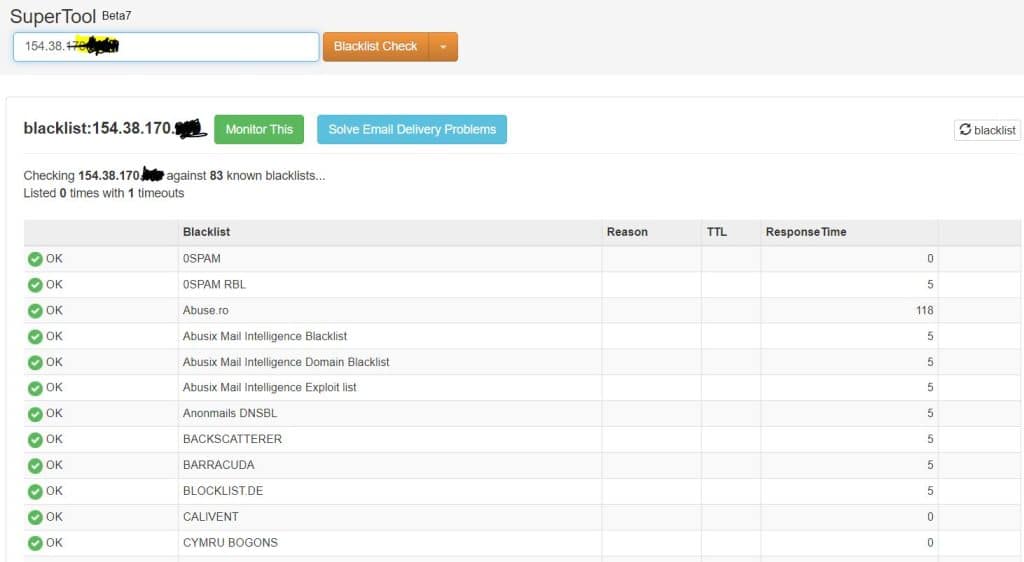
You want all the check marks to be green as shown in the image above.
If the ip address is found in any of those blacklists, then I strongly recommend asking
the VPS host to change your IP address, on the basis that it’s blacklisted.
You don’t want to start off in the black (list) side of things!
Connect the domain name to the VPS
Next, we need to connect the VPS IP address to the domain name.
And for that we’ll use cloudflare.
If you don’t have an account, create a free one.
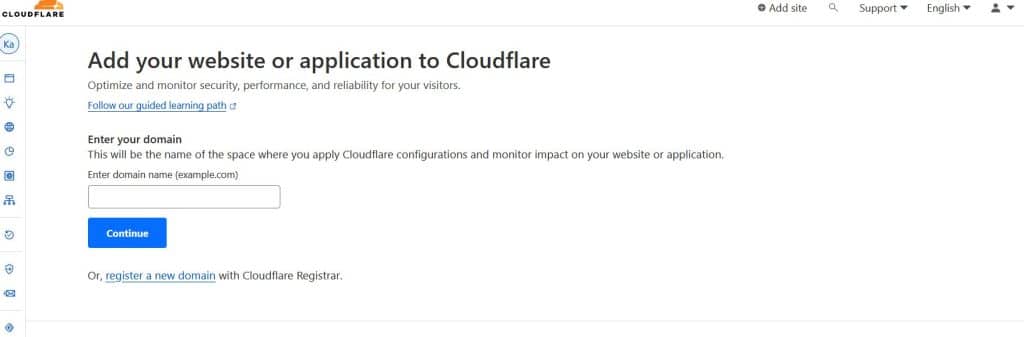
Once inside your CF dashboard, click on add website
Type your domain name without any www. e.g. mydomainname.com, and click continue.
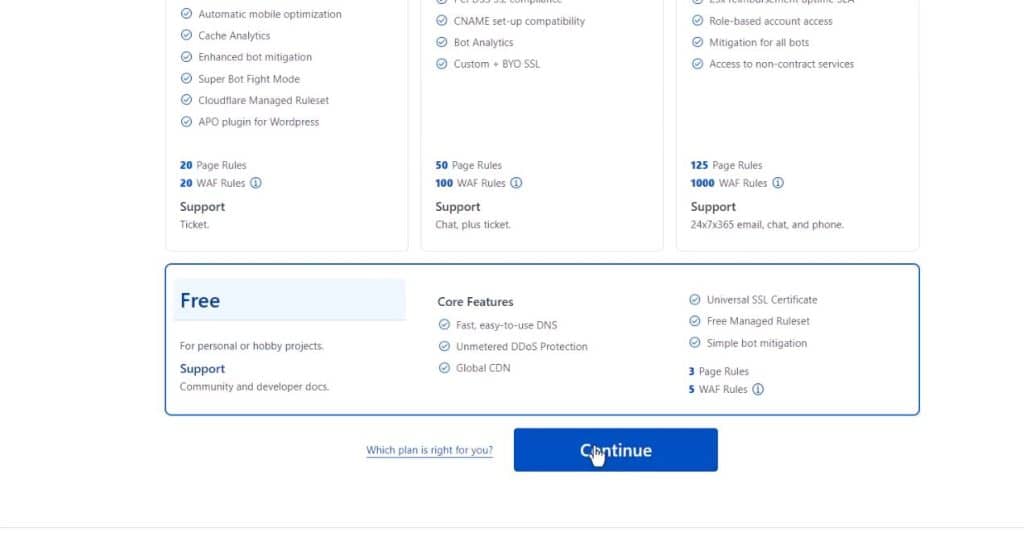
After that if you get a screen that already has dns entries (from the domain registar) like in the screen below, you will need to delete all of these before proceeding.
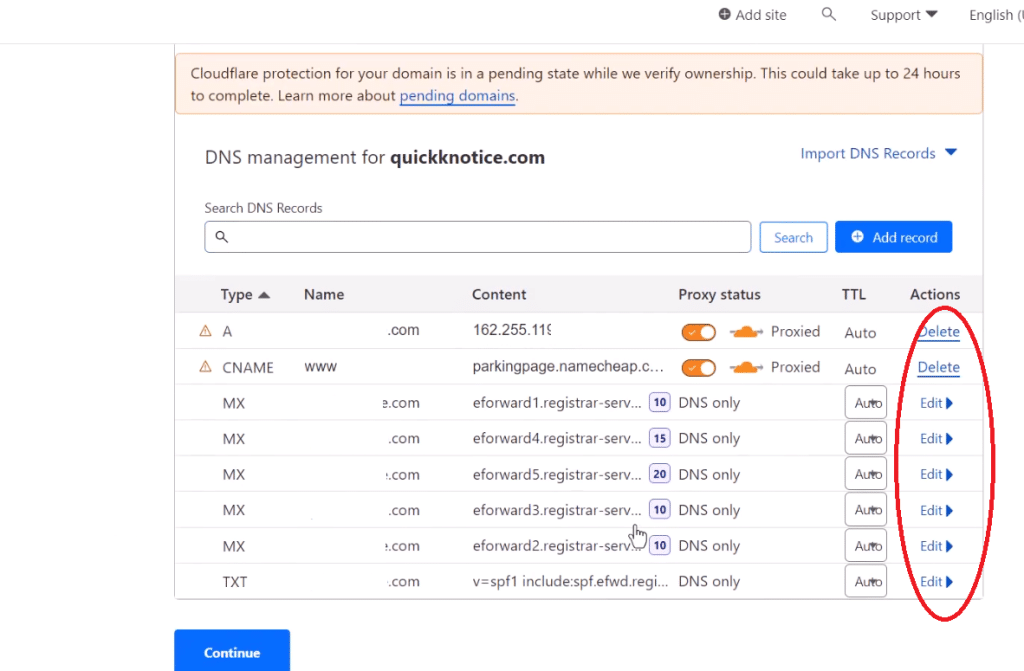
Click OK on adding records later, if CF prompts you.
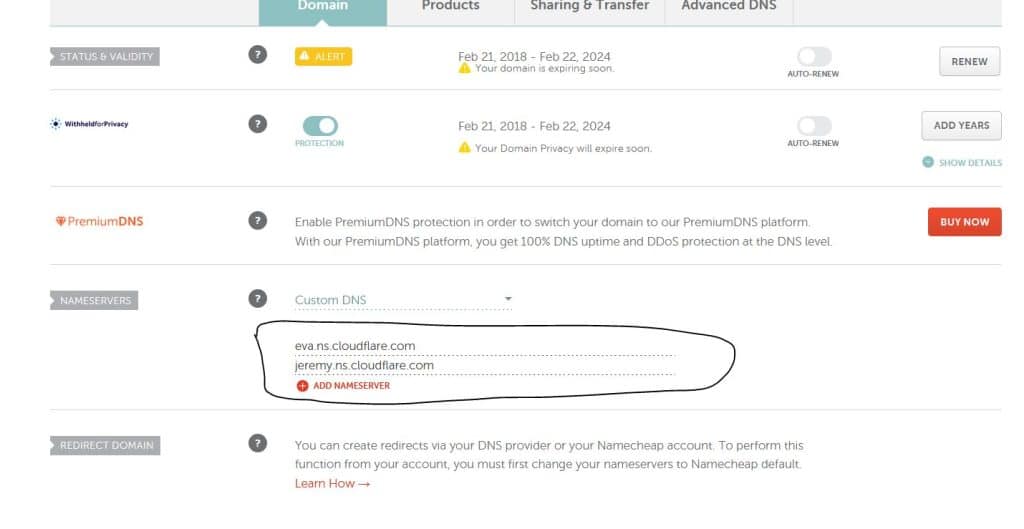
Next, copy the CF name servers and replace them with the ones in your domain provider.
If using namecheap, find your domain name, click on manage and under name servers select custom DNS and then paste the 2 name servers you’re given from CF.
After changing the name servers it will get anywhere from 10 minutes to a few hours for the DNS to propagate.
Once it’s done you should get a message like in the screen below when in your CF dashboard
Hint: CF will also email you that the site is ready.
Add Initial DNS Records for the SMTP
Next we need to start adding the initial required DNS records into the website added in CF under the DNS settings tab.
Click on DNS and once inside, click on add a Record
Select type A record
For name just type the “@” symbol ( which tells CF to use the domain name) and for the IPv4 adress, paste the VPS IP address.
Turn off proxy status
Tip: We are not going to be using CF CDN features. We are just using CF for its easy DNS settings and fast(er) DNS propagation times.
Click Save
Then we need to add the hostname record.
Usually this will be server.mydomainname.com (but the server wording can be any name really)
So click add a record and select record type A again.
in the name field you can type the word “server” and at the ipv4 address, paste the VPS IP Address.
For now you just need these 2 records as shown in the screen below.

VPS Setup
Next we’ll need to perform some setup inside the VPS server itself by running some Linux commands (and installing a very lighweight panel to make our life a bit easier to manage the VPS)
To do that we’ll first need to SSH into our VPS.
You can use a tool like “puTTY”. Download and Run PuTTY.
Just add the VPS IP Address at the hostname field inside PuTTY (leave the port to 22)
and click OPEN.
You’ll be asked to accept the new fingerprint key (shown at first login). Just click accept.
And then you’ll be asked for login name.
Type root and hit enter.
For the password, type whatever password you’ve made a note when buying the VPS
and hit enter.
Change Default Password & Hostname
Once you login, the first thing I’d recommend doing is changing the root password
to something stronger that includes special characters.
To do that just run the command:
passwdGive existing password if asked and type the new password (and again after the first time to verify it)
We’ll then need to change the default VPS hostname.
To do that we need to run the following command:
sudo hostnamectl set-hostname name.yourdomainname.comwhere name.yourdomainame.com is e.g server.mydomainname.com
Next we need to make the change permanent.
So we need to edit the following file by running the command:
sudo nano /etc/hostsOnce inside the file, navigate where the default VPS hostname will be (see screenshot), and change it to your hostname.

Just delete where it says vm1….contabo.net and replace with server.mydomainname.com. Then hit Ctrl+X and then Hit Y, to save the file
Tip: You can see that the hostname changed successfully if you type the command below and hit enter:
hostnameIt should return your own hostname
Next, we need to ensure the VPS runs the latest OS updates. So need to run the commands:
sudo apt update && sudo apt upgrade -y…and hit enter.
We let it do the necessary checks.
Then I recommend restarting the VPS server to apply any updates applied.
To do that, type the command below and hit enter:
rebootTip: the SSH connection will be lost. So you need to use PuTTY and SSH to the VPS again as before.
Install A Lightweight (cyber) Panel & Access It to Manage VPS more easily
Now let’s install a lightweight panel like CyberPanel to help us with the configuration.
To do that, type the following command, all in one line and hit enter:
sh <(curl https://cyberpanel.net/install.sh || wget -O - https://cyberpanel.net/install.sh)At some point the installation process will stop and you’ll be asked to select a few options.
The first one is whether you want to install Cyber Panel.
Type 1 and hit Enter.
Next, type 1 again and hit Enter (Install CP with OpenLighspeed)
Next, Type Y and hit enter (Install Full Service)
Next, Type N and hit enter (remote MySQL)
Next just hit Enter key to continue
Next hit the S key on your keyboard to set the CyberPanel admin password.
By default username is admin and pass is admin.
So make a note of the password, confirm it and hit enter again.
Tip: the password will not show as you type it.
Next type Y and hit enter (install memcashed and PHP extentions)
Next Type Y again and hit enter (install Redis and its PHP Extention)
Type Y and hit enter on the question about settng up WatchDog service
Now we wait for CyberPanel to install.
Tip: The installation process will take around 10 minutes to complete.
After it’s done, you will be given the login credentials
e.g. admin and the password you set as well as how to access the panel and asked
if you’d like to restart the server now.
Type Y and hit enter.
Wait for the server to reboot around 1 minute.
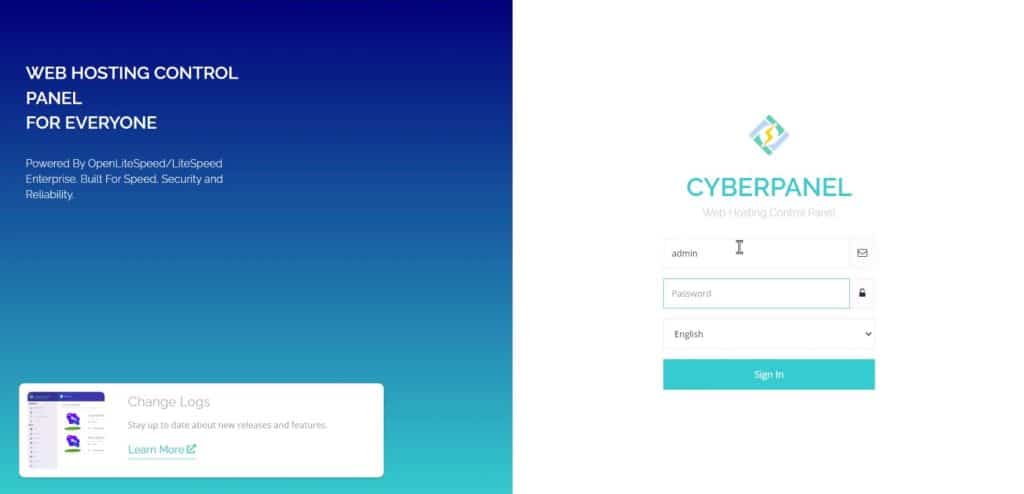
Then to access CyberPanel, just open up a browser, enter the VPS IP Address in the URL
and web port like that (replacing this IP with your VPS one)
e.g https://192.168.1.10:8090
Note: You will be given a browser security warning that the connection is not private. That’s OK. Just click on Advanced and then click to proceed to (unsafe) to get to the login screen.
Login using admin as the username and your CyberPanel password set during the CyberPanel Installation and click signin.
Create Website, Hostname sub domain & Issue SSL Certificates
The first thing you need to do is to add your website (domain name).
So click on Websites
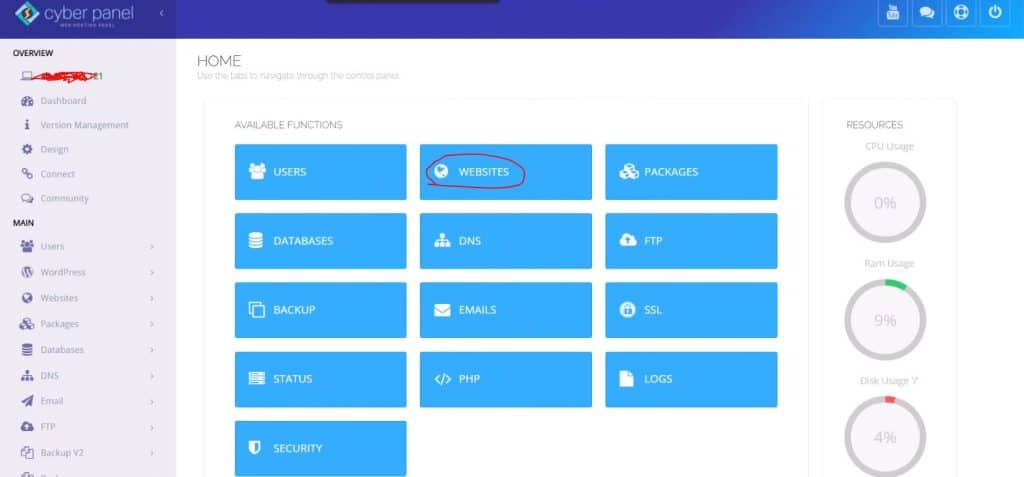
Click Create Website.
Enter your domain name.
Enter an email address for admin notifications.
select PHP 8.1 (not 8.2 as at the time of writing this it’s still buggy with CyberPanel)
Check all that can be checked under Additional Features and click Create Website.

Next we’ll create a subdomain to match the hostname we’ve setup.
So click on Create New Domain, from the left side of the CyberPanel Menu.
Select Website (main domain)
Under Domain Name type your hostname:
server.mydomainname.com
Leave the path as is (empty).
Under PHP, select 8.1
Check everything that can be checked under Additional Features and hit Create Domain
The subdomain is now created.
Next, let’s install SSL certificates on the SMTP server.
Install SSL on domain, hostname and mail hostname
Scroll down and on the left, click on SSL
Then click on Manage SSL
Select Your Domain and click Issue SSL.
Wait till it says done (can take couple of minutes)
Next locate the SSL menu again and click on Hostname SSL
Select Your Subdomain for website e.g. server.mydomainname.com and
click Issue SSL
Next let’s issue the last SSL certificate for the mail server.
Locate SSL menu and click on MailServer SSL (note it will give a browser warning. Just click Advanced and Proceed).
Select the created by default mail.mydomainname.com subdomain and click Issue SSL
Next, we’ll need to add the necessary DNS records needed for the SMTP to authenticate and inbox.
Configure DNS Records for the SMTP to Authenticate
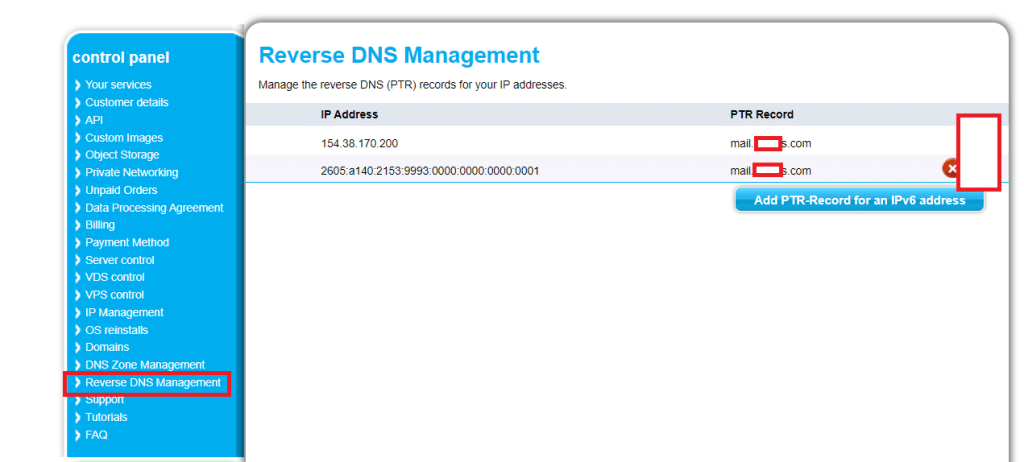
First let’s setup the Reverse DNS setting to match your MAIL hostname.
This is important and one of the reasons emails don’t hit the inbox if this is not set right.
To do that you’ll need to be inside your VPS host dashboard.
So head over to your host dashboard and find somewhere the option (usually under networking) the option to edit the Reverse DNS.
Edit and add the hostname next to the IPv4 and IPv6 Addresses.
Next head back to your CloudFlare account. We’ll need to add a few more records. Just follow along…
Under DNS tab for your website, click Add a record of Type A.
Set the name as “mail” and put your VPS IP address under IPv4 Address, Turn Off Proxy Status and click Save
Add another type A Record. Set the name to “server” and again give your VPS IP address. Turn Off Proxy Status and click Save
Add another type A Record. Set the name to “www.server” and again give your VPS IP address. Turn Off Proxy Status and click Save.
Add another type A Record. Set the name to “www.mail” and again give your VPS IP address. Turn Off Proxy Status and click Save
Now add the mail related MX record.
Click Add Record and select MX for the type from the drop down list.
For the name put the “@” symbol and for Mail Server Name put: mail.yourdomainame.com. Set the priority to 10 and click save.
SMTP DNS Records
Now let’s configure the SMTP DNS records. Namely: DKIM, SPF and DMARC
Pro TIP: These are the required records that GMAIL and Yahoo need any Mail Server to have
to properly authenticate emails sent.
All 3 work together to autenticate emails.
DKIM Authentication DNS Setup
The 1st one we are to do is the Domain Keys Identified Mail (DKIM) record.
ProTip: DKIM signs our emails using the domain’s public key and verify they come from us (our domain).
For that head back to CyberPanel and locate from the left the DNS tab.
Click on Add/Delete records.
Select Your main Domain (e.g. mydomainame.com)
Then click on TXT tab
Locate the entry starting with Name “default._domain”.
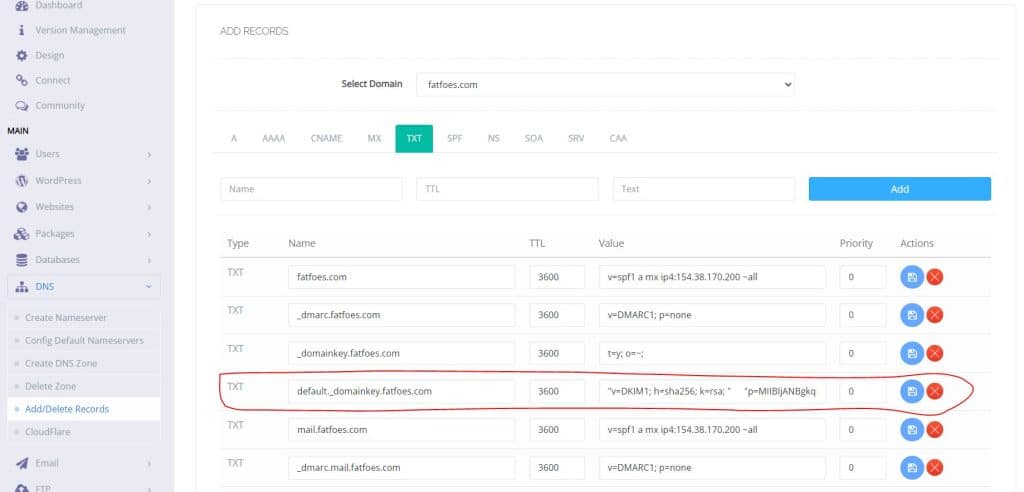
Copy that phrase “default._domain” and head back to CF and create a Record of type TXT.
Paste the phrase copied under name.
Then head back to CyberPanel DNS screen again and copy the contents of the Value next to that default_.domain phrase.
You will need to highlight all and copy All contents on the right.
Head back to CF and under Content paste the Value contents copied.
Tip: Make sure to delete (JUST but no need for the spaces if any) the quotation marks from the pasted contents.
Hit Save.
SPF Authentication DNS Setup
Next we need to add the Sender Policy Framework (SPF) record.
Pro Tip: This is basically the record that indicates the authorized email servers that can send an email on your domain’s behalf.
Create a record type TXT.
For the name, type the “@” symbol.
And For Content type:
v=spf1 mx a ip4:xx.xx.xx ~all
You will need to replace xx.xx.xx with your actual server IP address.
Hit Save.
DMARC Authentication DNS Setup
Next we need to add the Domain-Based Message Authenticationm Reporting and Conformance (DMARC) record.
ProTip: DMARC greatly reduces someone’s ability to get phishing and spoofed email to an end user’s inbox impersonating the email came from our own domain.
Create a record type TXT.
For name type: _dmarc (note the underscore at the beginning)
For contents type:
v=DMARC1; p=none; sp=none; rua=mailto:[email protected];ruf=mailto:[email protected]; pct=100; ri=86400
Hit Save.
A quick explanation, the first part of the DMARC record, e.g. v=DMARC indicates that DMARC should be applied (similar to the 1st bit of SPF). And it triggers the email system to look further into the record to find DMARC rules.
The P (and SP for sub domains) flag(s) tell the server what to do if DMARC fails.
In this example, the system does nothing with the email, but the administrator gets a report on messages that fail DMARC.
This is an OK setting when first starting out.
But later on, once you ensure that your settings are ok, you should change the p (and sp) flag(s) to “reject”
The Rua and Ruf settings are optional but I recommend setting them up so you can receive reports (from the ESPs) on what is going on with your emails and why they fail, especially when p is set to none.
Once you’re done you should have the records as shown below (with your domain name and IPs as appropriate)
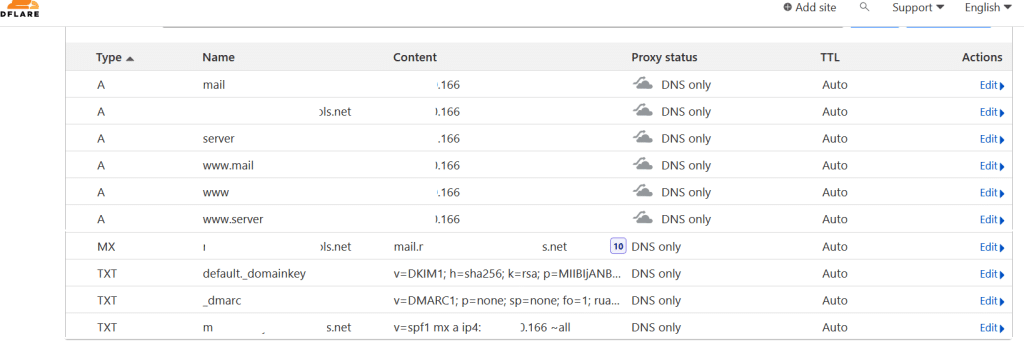
We are now almost done.
Test The SMTP Email Server
Create an Email Account
Let’s create an email address so we can test our SMTP Mail Server inbox score on mail-tester.
Head back to CyberPanel and locate the Email tab and click on Create Email.
Select the main domain name.
Give your From Name username e.g. kostas and set a password.
ProTip: This will be your email account (and email from) on the SMTP server
Click on Create Email
Next click on List Emails tab from the left.
Select your main domain
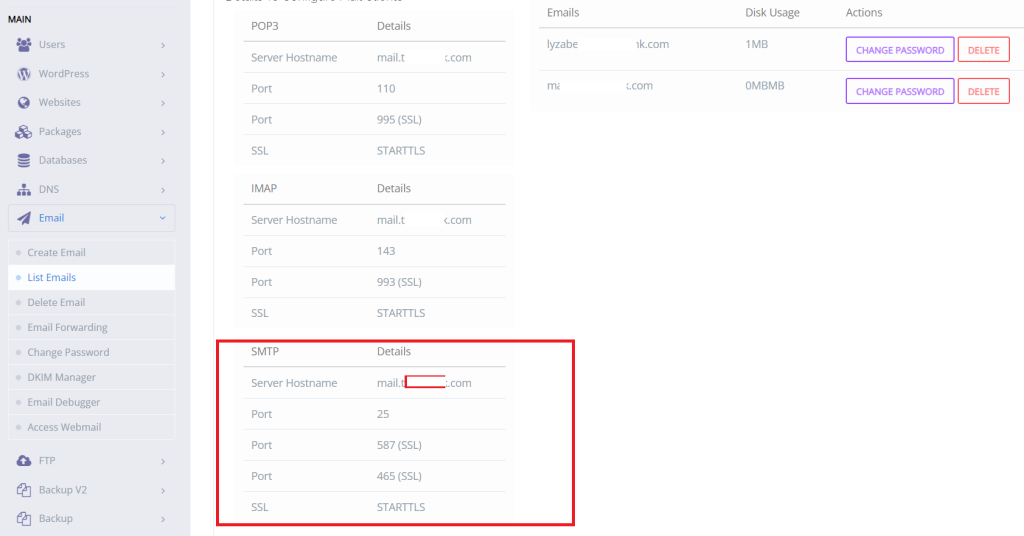
ProTip: The settings you see on the left at the bottom are the SMTP Credentials to connect to use with any bulk email sender.
Now let’s access the email account just created, so we can test the SMTP.
Test SMTP With Email-Tester
Click on Access Webmail tab from the left.
Login using the username (email address created) and chosen password.
Then head over to the www.mail-tester.com website.
ProTip: This is a very handy site tells us what we need to fix if any to get our emails inboxing from a tech perspective.
Copy the email address shown.
Head back to your webmail client.
Click On New Message from the top left.
Paste the email address copied from the mail-tester site next to the To: field.
In the subject type: This is a test
In the email body type something like:
Thank you Kostas for sharing this information on how to setup my own SMTP server 🙂
Once done, Hit Send.
Give it 10 seconds or so and head back to the mail tester website.
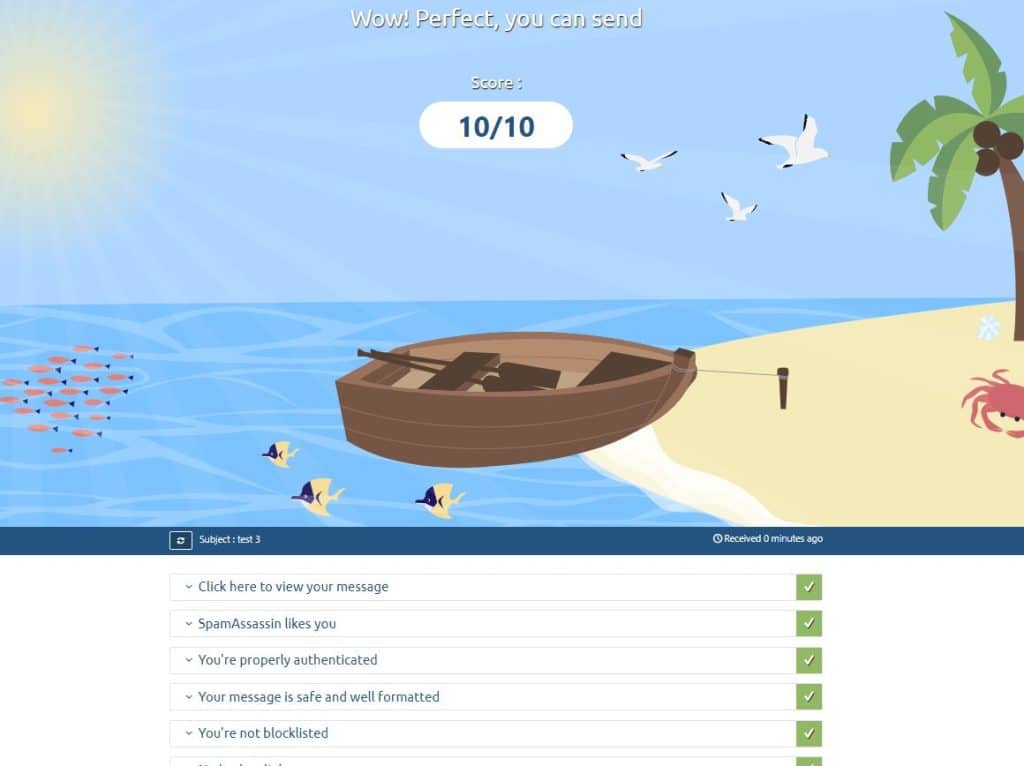
Click on Check Score.
Tip: you may need to wait a few seconds for the mail-tester to receive your email.
After a few seconds you should see a picture with your score which should be 10/10!
You can also test by sending an email the same way to one of your GMAIL accounts and see if you receive it.
Setup Firewall Rules (optional)
One last thing that’s optional but highly recommended, is to setup a firewall on your VPS and only open the required SMTP (plus ssh and cyberpanel) ports.
Here’s the list of commands to use:
Open SMTP Ports
Login to your VPS via PuTTY and then Type )one command at a time/line:
sudo apt update

sudo apt install ufw

sudo ufw allow 22

sudo ufw allow 25

sudo ufw allow 587

sudo ufw allow 465

sudo ufw allow 8090

sudo ufw allow out 22

sudo ufw allow out 25

sudo ufw allow out 587

sudo ufw allow out 465

sudo ufw allow out 8090

sudo ufw enable

sudo ufw status verbose
This last command should give you a list with all the rules just typed above…
So there you have it.
You now have your very own perfect sending and fully compliant with GMAIL and Yahoo (and others) authenticated SMTP mail server.
By The Way…
If you find the above too technical or you want to do this but don’t have the time…
For a limited time, I’d do all this for you and connect a recommended bulk mail client (like this one)
…optimized for bulk emailing (Database and so on)…
…And also give you a 2-hour consultation on how to best use your email server (how to build your list, traffic to use, offers to mail for etc)…
Then you can Get More Info HERE.
Regardless, I hope you enjoyed this guide.
…And if you have any questions, please ask.
BTW – If you want to learn how to use email and get positive ROI and consistently higher EPCs, my Omnifarious Method might be for you.
Just click the button below and let me know where to send it.

Kostas “Build Your Own SMTP Email Server” Papadakis